Pages

Wednesday, July 9, 2014

New Customized Photo Beer Labels on Zazzle

ADD YOUR PHOTO TO YOUR OWN HOMEBREW BEER LABELS

Hello! I haven't posted for a while, but I wanted to stop in and introduce my newest beer labels on Zazzle. They were inspired by "Breaking Bad." I was watching Hank Schrader make his Schraderbrau beer and I noticed that the labels had his picture on them - and I realized I hadn't made any labels where you can add your own photo. So, I made a template and fancied up the labels with some hops and barley stencils. You have your choice of a few different formats and colors, too. Some have a central beer image below the photo and some have a hops image:

Here's the brown label with a central beer image. All the text is easily customizable:

Here it is with the hops in the middle:

And here's an alternate version where you can add a short slogan to the label:

See all the colors and varieties of this beer label in the FancyCelebration store here. You'll also find matching coasters, posters and some other items there.

I'm excited about these new beer labels and plan to make more photo template ones in the future. I'm hoping to get a Christmas-themed one done before the holiday season, for anyone giving beer as a gift. So, feel free to stop by and see what's new!

-MK
Visit all my stores on Zazzle
See my book on Amazon
All images copyright MK Hess

Tuesday, June 3, 2014

Zazzle Father's Day Gift Ideas and Promo Code: Up to 65% Off

 ZAZZLE FATHER'S DAY SALE

2016 UPDATE: See a collection of Fun Father's Day Gift Ideas on Zazzle here.

***

Zazzle is having a really good promotion for the next couple of days, if you're looking for Father's Day gifts and many other items, too. Enter 4EVERYFATHER at checkout (see details here). You can get up to 65% off some items, like cards and invitations (which would make this the perfect time to buy 4th of July invites). Dartboards, posters, hats and clocks are 45% off and t-shirts are 25% off. Here are some ideas that are on sale, if you're still looking for a gift for your dad:

45% OFF DARTBOARDS

For the dad with a man cave:

For the writer dad:

For the camo / man cave dad:

Make your own dartboard:

45% OFF CLOCKS

For the dad who's a space or sci-fi fan, an outer space clock and a wormhole number clock:


25% OFF T-SHIRTS

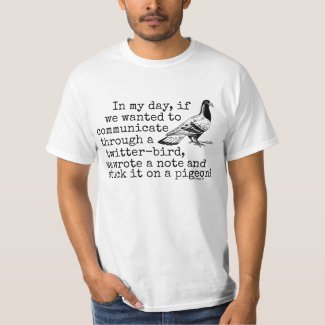
For the dad who dislikes today's social media

Boat loving dad

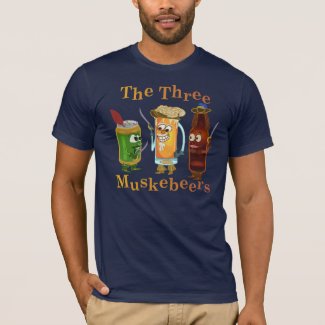
Beer dad

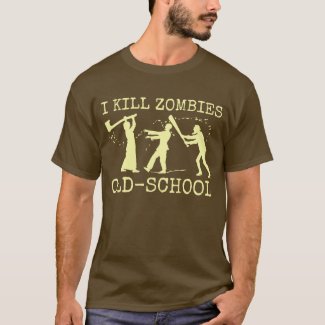
Zombie dad

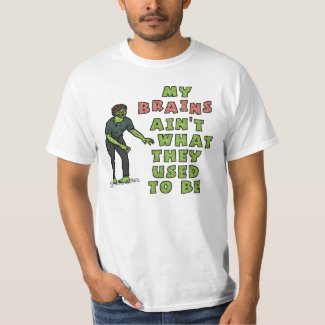
More zombie dad or grandpa

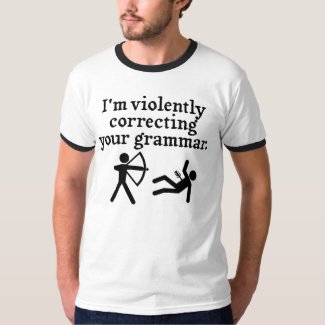
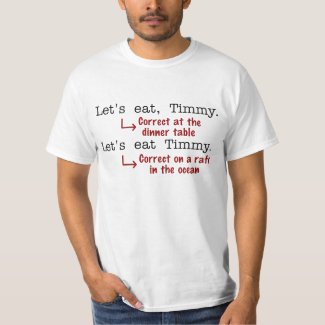
Funny grammar dad

More funny grammar dad

15% OFF MISCELLANEOUS ITEMS

Custom saloon coasters

Make your own mini basketball hoop


I hope that gives you some gift ideas for your dad. If not, you can always search the entire Zazzle marketplace. Happy Father's Day!

-MK
On Zazzle
On Amazon
All images copyright MK Hess

Monday, June 2, 2014

Writer Prompt: Quantum Teleportation

Quantum teleportation has been in the news a lot this week (see here, here and here). I'm not going to pretend that I understand it, but I do think it's fascinating and I love trying my hardest to grasp it. Even a daydreaming, creative writing, doodling weirdo like myself can tell that this data transfer is a major breakthrough.

So, for your writing prompt, write a story set in a world where quantum teleportation is taken for granted. That can mean anything you want: Is data received instantly or even before it was sent? Have scientists found a way to teleport people? Read about quantum mechanics or any other aspect of science that you find fascinating today and imagine a future society or alternate world where today's breakthroughs are commonplace.

-MK
on Zazzle
on Amazon 

Sunday, June 1, 2014

E-Book Cover Advice for Self-Published Authors

I stumbled across this monthly book cover design contest last summer, when I was making my own cover and feeling very anxious because I'd never made one before. Authors submit e-book covers every month and Joel Friedlander (read about him here) makes comments on each, explaining what works and what doesn't and why. Even if you're not daring enough to submit your own cover efforts (or maybe you are!), looking through the contest entries and reading the reviews might help with your design. For instance, you learn quickly that red lettering on a black background does not usually work well. Check it out and get some book cover inspiration.  Then, use the free GIMP to make your own.

-MK
on Zazzle
on Amazon   

Saturday, May 31, 2014

Customize Your Fourth of July Celebration on Zazzle

Independence Day is right around the corner here in the USA, and if you're planning on having a big Fourth of July celebration, now is the time to order your personalized invitations and other items. Check out all the cool 4th of July designs on Zazzle:
http://www.zazzle.com/fourth+of+july+gifts?rf=238713858877306074&tc=bg


And don't forget to look for promo coupon codes.

-MK
On Zazzle
On Amazon

Friday, May 30, 2014

GIMP Tutorial: Simple Gaussian Blur Behind Text Effect

GIMP TEXT TUTORIAL FOR BEGINNERS: SIMPLE BLUR BEHIND TEXT

     This is a simple effect you can do in GIMP to make your text pop out a little more from the background. There are plenty of ways to make your text stand out more, such as adding a drop shadow or a border. But this is a more subtle method using gaussian blur - and it's very easy, too. After learning this effect, you can experiment and try things like adding a glow to your text or creating motion.

 Step 1: Open GIMP and create an image whatever size you want. I made mine at 1000 x 1000 pixels, 200 ppi for this tutorial. Fill the background with black.

Step 2: Next, select a medium-blue foreground color (mine is 00008F code). Select the Blend Tool and set the gradient to "FG to Transparent," with a "radial" shape. Put your cursor directly in the middle of the canvas, hold down your mouse button and drag and release at the edge. You should now have a round blue shape like this:

Gaussian Blur Text Effect 1

Step 3: Now go to Layer -> New Layer and add a transparent layer. Make the foreground color white and use your text tool to add your words to the design. I used Arial Bold, size 70, centered. When you have your text the way you want it, select Layer -> Merge Down so it becomes part of the transparent layer:

Gaussian Blur Text Effect 2

Step 4: Right click on your text layer in the toolbox and click "Alpha to Selection." Now go to Layer -> New Layer and make a new transparent layer. Use the Bucket Fill tool to "Fill Whole Selection" with black (code 000000). Now go to Select -> None. It should look like you have black text now. Move this new layer below the white text layer (your text should look white again).

Step 5: With the black text layer selected, go to Filters -> Blur -> Gaussian Blur. Set the blur radius (horizontal and vertical) to about 40. You now have a slight black blur behind your white text, making it pop out a little more. NOTE: Depending on your image and text size and font, you'll have to experiment with how much blur you want.

Step 6: If you want to make it pop out even more, simply right-click on the blurred layer and select "Duplicate Layer." I duplicated it a couple times:

Gaussian Blur Text Effect 3

Step 7: Now you can merge your layers together for the final image. Doing this simple effect can really make your text pop out from the background, while also being subtle. Experiment with different color variations. Do a dark text with a white Gaussian blur behind it. Try lessening the opacity of the blur for an even more subtle effect and experiment with different amounts. See what happens when you change the layer mode.
The final image:

Gaussian Blur Text Effect 4

That's it! Here are a few more examples. Red text on a red background becomes visible without having a harsh outline. Adding a subtle white blur behind text on a lighter image makes the text more legible. The dark blur behind the text on the right makes it easier to read against the camouflage pattern. 

Gaussian Blur Text Effect 5

This is a very simple technique to learn, but it makes your designs look more polished.

Have fun using GIMP!

-MK
On Zazzle
On Amazon
All images copyright MK Hess

Wednesday, May 28, 2014

Writer Prompt: The World 20 Years in the Future

WRITER STORY STARTER: IMAGINE OUR NOT-TOO-DISTANT FUTURE

I'm always afraid to throw away computer information as long as I still own the computer. After all, you never know when you might need the manual for that giant dinosaur desktop machine you still have sitting in the corner, kept solely because it plays Monkey Island games so well (and you never know when you'll need a working floppy drive!). Well, I finally gave away the old desktop and recently, I went to remove all its information from the computer drawer. To my surprise, I still had the old newspaper advertisement where I first saw the computer. It was circled on the page. Of course, I had to sit down and laugh at all the specs I thought were great at the time. 

In a little over a decade, computers had changed a lot. And if you keep up with tech news, you know there are plenty more changes in the works all the time. It's easy to see what awaits us in the coming year or two. But what about a decade in the future? Two decades? In another ten years, will you sit down and laugh at the computers and smart phones you own now? 

For this writing prompt, be a visionary. Think about all the technology in our world today and try to imagine what it will be like when today's newborns go to college. How will the changes in technology change society? How will your characters' lives be affected, for good or bad? 

 -MK
on Amazon   

Tuesday, May 27, 2014

Create Your Own Custom T-Shirt on Zazzle + Coupon Codes

MAKE YOUR OWN ZAZZLE SHIRT IN 10 STEPS

You can make any kind of t-shirt you want on Zazzle. You can show off your own brand, make a clever design for your favorite hobby or design family reunion shirts for your entire family, complete with name and year. As long as you don't use trademarked items like Mickey Mouse (although, Disney does have a shop there if you're looking for Mickey), the possibilities are endless. But how do you design your own shirt on Zazzle?

Here's how:

1. Follow this link, where you will find a Zazzle shirt with a template already made for you. You'll find the lowest-priced white shirt with a red square on it that says "Replace This with Your Own Design!"

2. Make your design using Photoshop or a free program like GIMP. You can make your design square for the sake of simplicity (2000 x 2000 pixels or 3000 x 3000 pixels, at somewhere between 200 and 300 ppi works well), but the available design space is actually a little more rectangular. A 2000 x 1720 pixel or 3000 x 2580 would fill the whole space. You can make it horizontal or vertical. I'll tell you how to adjust it on the shirt in step 5.

Design tip: If you want help with a GIMP issue, you can usually find a tutorial online.

Here is another design tip: If you're not very good at drawing, you can get a little help from free clip art. Try clickr or openclipart. Just be careful with free images; make sure they are public domain before you use them.

3. Once you have your design done, save it as a .PNG file in an easy-to-find location. On the Zazzle T-shirt page, click "Change" under the sample image in "Personalize It." Upload your design. It will replace the sample.

4. Now, click "Customize It" - a button that appears under the shirt.

5. You'll now have a new set of controls on the right. Find the button that says "Design Area" and select either horizontal or vertical.

6. Next, you need to make sure your design fits the printed space because anything outside of it won't print. You'll see some buttons in the top left. Click on the second one down, the one that says "Show/Hide Art View" when you hover over it. Now you'll see a close-up view of the design space.

7. Use the - and + buttons on the right to adjust your image size (hold down "ctrl" at the same time to make minor adjustments). Use the tools under "Edit" and "Arrange" to center your design and make more changes. Add text or another image. Leave Design View to see how it all looks on the shirt.

8. Do the same on the back of the shirt if you want an image there. Click on the back view of the shirt to add images to it.

9. Now select your shirt style. On the right side, farther down, you'll find the "See all styles" button. After that, select the color and size. Make sure your shirt color looks good with your image (what you see on screen is what you get).

10. Now your shirt is done! You might also find a coupon code here to make the deal even sweeter.

Have fun designing!

-MK
See my designs on Zazzle

Monday, May 26, 2014

Funny Feminist Reply to "Make Me a Sammich"

If you have a dark sense of humor and you're tired of the "make me a sammich / sandwich" chauvinist comments, here's the funny poster for you. When I made this one, I hunted for the right vintage image - the woman had to have a look on her face that was happy but also a little devious.

-MK
on Zazzle
on Amazon

Sunday, May 25, 2014

Customize Your Wedding on Zazzle

ORIGINAL WEDDING DESIGNS ON ZAZZLE

My own shops do not (so far) focus on weddings, but there are plenty of Zazzle shopkeepers who have mastered the art of creating the perfect wedding set for every style. I'm often in awe of all the beautiful designs. If you're looking for that extra special wedding invitation or save-the-date card, look here:

http://www.zazzle.com/wedding+ideas?rf=238713858877306074&TC=BG


And don't forget to check for promo coupon codes, to keep everything within your budget.

Have a special wedding day!

-MK